Publish Banners
Publish query and field-based Banners
Overview
The Banners section allows you to effectively promote products, brands, special offers, or seasonal sales directly on your platform. With a single click, shoppers can be redirected to the desired landing page, ensuring a seamless user experience.
Types of Banners
Query-based Banner
Query-based banners are tied directly to specific search queries. They appear on the search results page when the merchandised query matches the shopper's query. Ideal for promoting brands, offers, or events explicitly related to what the shopper is searching for.
How It Works:
- Define a specific query in the Merchandising Workbench.
- When a shopper enters that query, the banner is displayed at the top of the search results page.
Use Cases:
- For the query “Woolen jacket”, display a banner:
“Flat 20% Off on Winter Wear – Limited Time Offer!” - For the query “Gaming Laptops”, display a banner:
“Buy a Gaming Laptop Today and Get Free Accessories!”
Field-based Banner
These banners are contextually triggered based on the products in the search results. Displayed when more than 80% of the results match specified field rule criteria (e.g., category, product type, brand).
How It Works:
- Define field rule criteria, e.g.,
Product Type: Running ShoesorBrand: Nike. - If 80%+ of search results match this rule, the banner appears.
Use Cases:
- If a shopper searches “Running Shoes” and 80% belong to the Nike brand, show:
“Shop Nike Shoes at 10% Off” - For “Cost-friendly smartphones” where most results are under
$500, show:
“Exclusive Offers on Cost-Friendly Mobiles!”
Tip:
- Use Query-based Banners for predefined search control.
- Use Field-based Banners for dynamic, product-driven promotions.
Banner Asset Setup

Create A New Banner
You can configure your banner in two ways:
- Use a Pre-Designed Image
- Write Custom HTML Code
1) Pre-Designed Image
- Banner Image URL: Link to your hosted image.
- Destination URL: The URL to redirect users upon click.
Note: Ensure the image URL is publicly accessible.
2. HTML Code
You can create custom banners with HTML. Here’s an example:
<div style="width: 100%; background-color: #f8f9fa; padding: 20px; text-align: center; border: 1px solid #ccc;">
  <a href="https://example.com/cost-friendly-mobiles" style="text-decoration: none; color: inherit;">
    <img src="https://example.com/banner-image.jpg" alt="Exclusive Offers on cost-friendly mobiles!" style="max-width: 100%; height: auto; border-radius: 8px;">
    <h2 style="font-family: Arial, sans-serif; color: #333; margin-top: 10px;">Exclusive Offers on Cost-Friendly Mobiles!</h2>
    <p style="font-family: Arial, sans-serif; color: #555; font-size: 16px;">Click here to shop now and save big!</p>
  </a>
</div>
Code Breakdown:
<div>: Banner container with styling<a>: Entire banner is clickable<img>: Displays banner image<h2>and<p>: Banner message and CTA
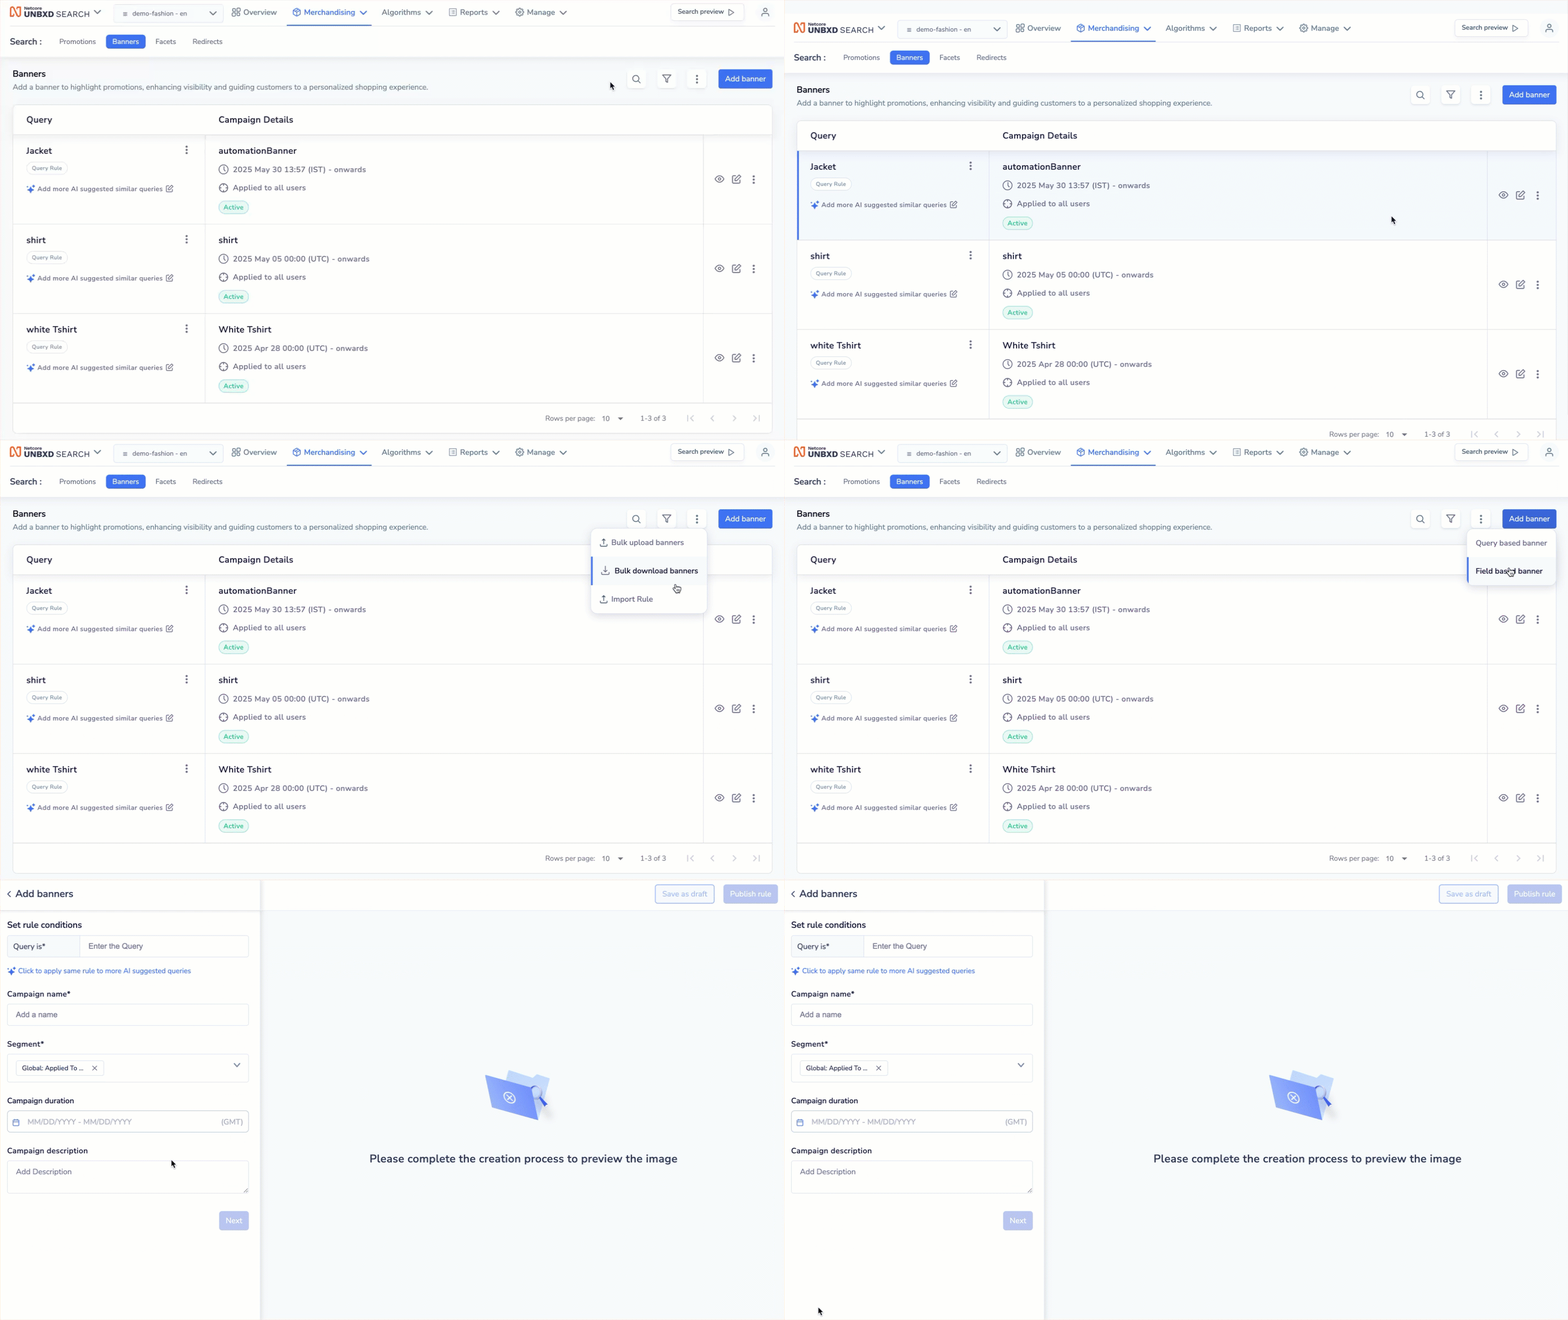
Setting Up a Query-Based Banner
Step-by-Step:
- Log in to Netcore Unbxd Console.
- Select your Site Key.
- Go to Merchandising > Search > Banners.
Create a Campaign:
-
Click New Banner > Query-Based Banner.
-
Enter the Query (shopper's search term).
-
Click + Apply same rule to more queries to add more.
-
Add a Campaign Name for internal tracking.
-
Choose a Segment or Create New Segment.
-
Set Duration (Start/End time, Time Zone).
- Optionally enable Run Perpetually.
-
Add an optional Description.
-
Click Next.
Configure Banner:
- Add either the HTML Code or the Pre-designed Image URL + Destination URL.
Save or Publish:
- Click Save Draft or Publish Rule.
Banners Overview Page: Actions You Can Take
You can manage campaigns through the Overview Page:
- View all campaigns
- Configure field settings
- Edit or delete campaigns
- Publish draft campaigns
- View campaign rule summaries
- Duplicate campaigns
- Add multiple queries to one rule
- Launch new campaigns for the same query
- Stop active campaigns
- Preview live site with banner
- Bulk upload banners via CSV
- Import/export banners across sites
Updated 7 months ago
