Manage Experience
Create New Experience

Create a New Experience
Follow the steps given below to create a new experience.
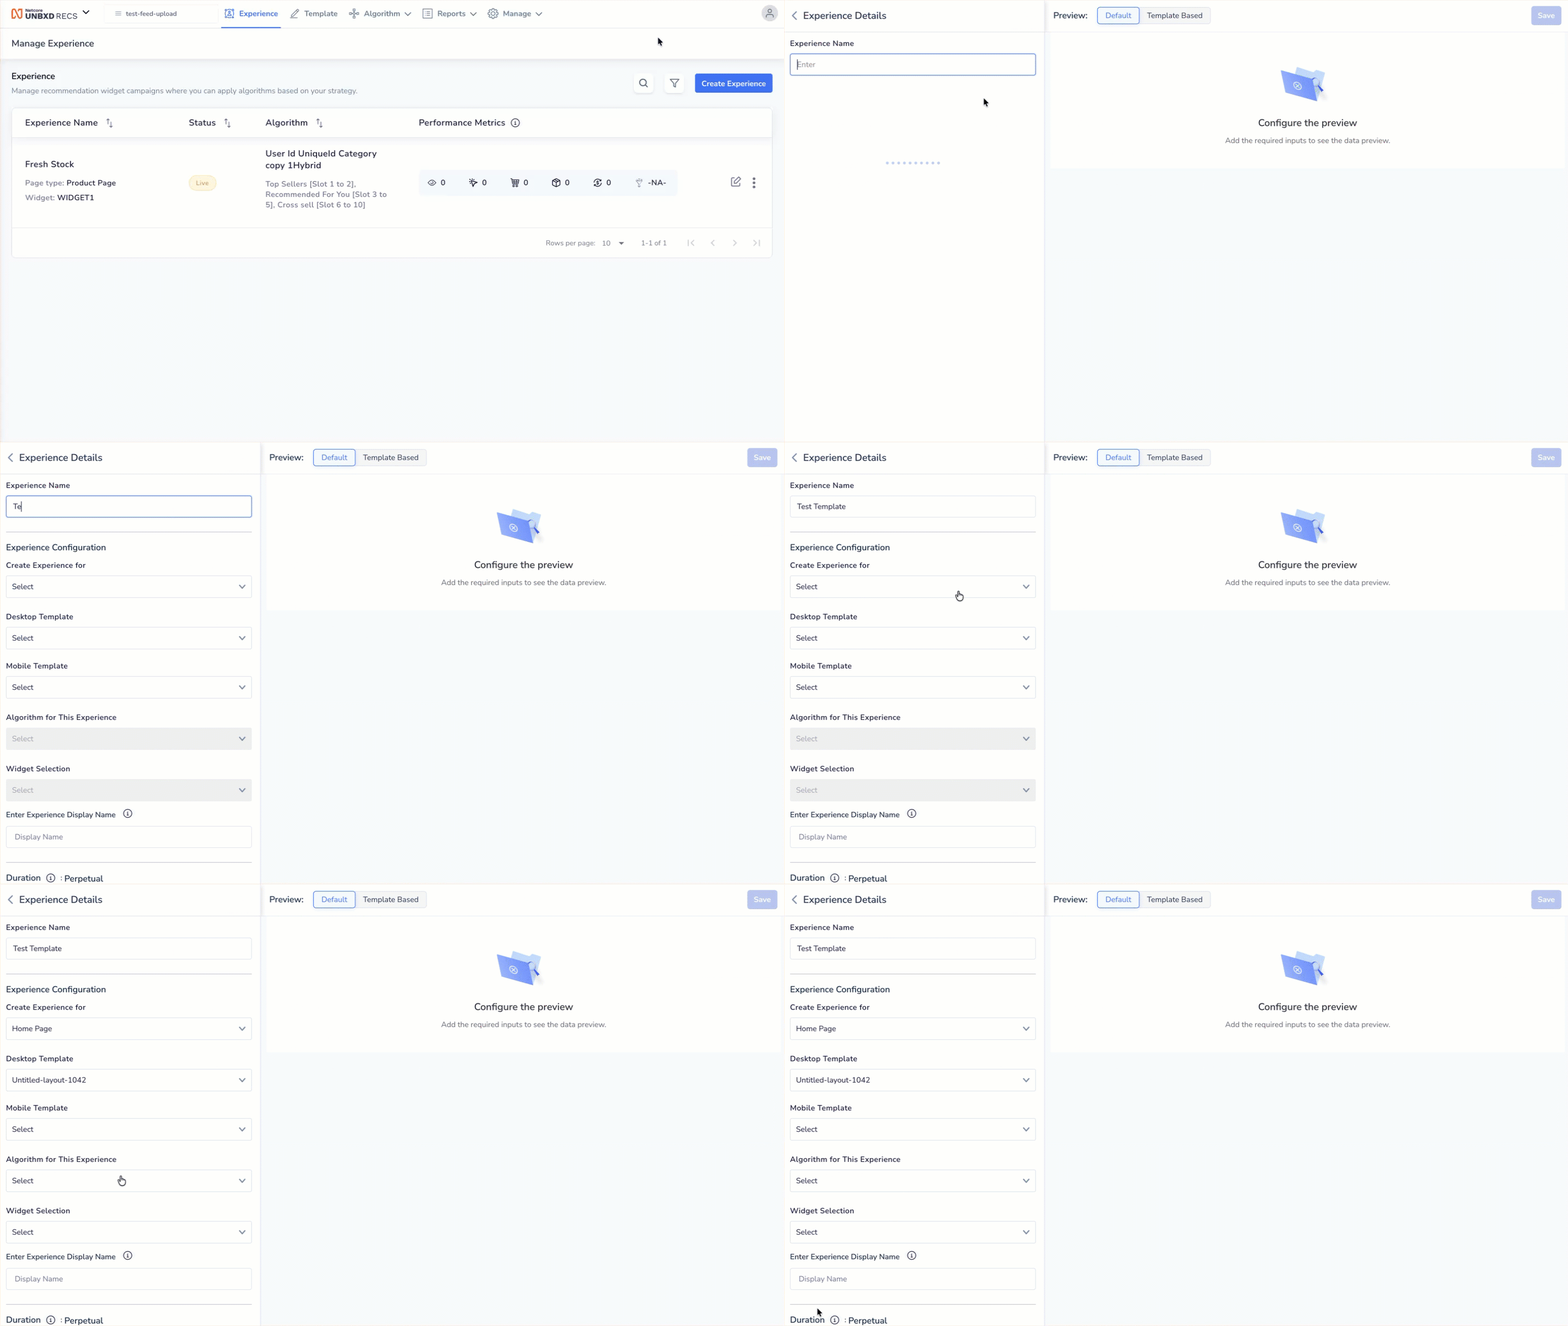
- Log in to the Unbxd Recs console. The Experience page opens by default.
- Click Create Experience located on the right of the screen. The Experience Details page appears.
Refer to the given table to know the Experience configuration options. You can run customized recommendation strategies across different pages by configuring these options.
Field | Description |
|---|---|
Experience Name | Provide a name for your experience. |
Create experience for | Select the page type where this recommendation experience will run. The options in the dropdown are: Home Page, Product Page, Category Page, Cart Page, Brand Page, Boutique Page, Complete The Look, Journey Page, Broadcast Page |
Desktop Template | Select from the dropdown a layout for how the recommendation widget will appear on desktop devices. |
Mobile Template | Select from the dropdown a layout for how the widget will appear on mobile devices. |
Run your Experience with | Select the recommendation logic that decides which products will be shown in the widget. This defines how recommendations are generated. |
Place your Experience | Select where this widget will appear on your site’s page layout. |
Experience Display Name | Enter the name of the experience/ widget available to your shoppers on your website or app. Example: Recommended for you, Frequently bought together, and so on. |
Duration | Define how long the experience should run. The options here are:
|
Updated 4 months ago
