GTM Analytics Dashboard Configuration
Introduction:
For GTM Analytics integration, we require the setup of tags, triggers, and variables in the GTM dashboard, which are standard across all customers.
Earlier, we used to manually create all 12 events we have in Analytics (including browse and Recs). Still, the task of managing datalayer push code rests on the client’s end. Still, for these configs(tags, triggers and payload variables) that are done at the level of GTM dashboard, it can be replicated to new customers without any manual intervention to create them.
This can be facilitated with the help of import and export options which GTM provides across containers.
Benefits of Using Import/Export Config Template:
- It saves time when setting up the GTM dashboard configurations manually for 12 events for three different parameters each.
- It maintains a standard template to avoid any issues/errors/typos while copying and pasting the code for each config.
Steps to Import Config in New GTM Account:
PrerequisitesWe will require a container config file which is in json format. You can download this file attached below from here and upload it as per the subsequent steps:
- Log in to the customer GTM dashboard and in the appropriate workspace where we need to add the Unbxd-related configs for tags and triggers.
Inside this page, click on the Admin tab as mentioned in the screenshot below:
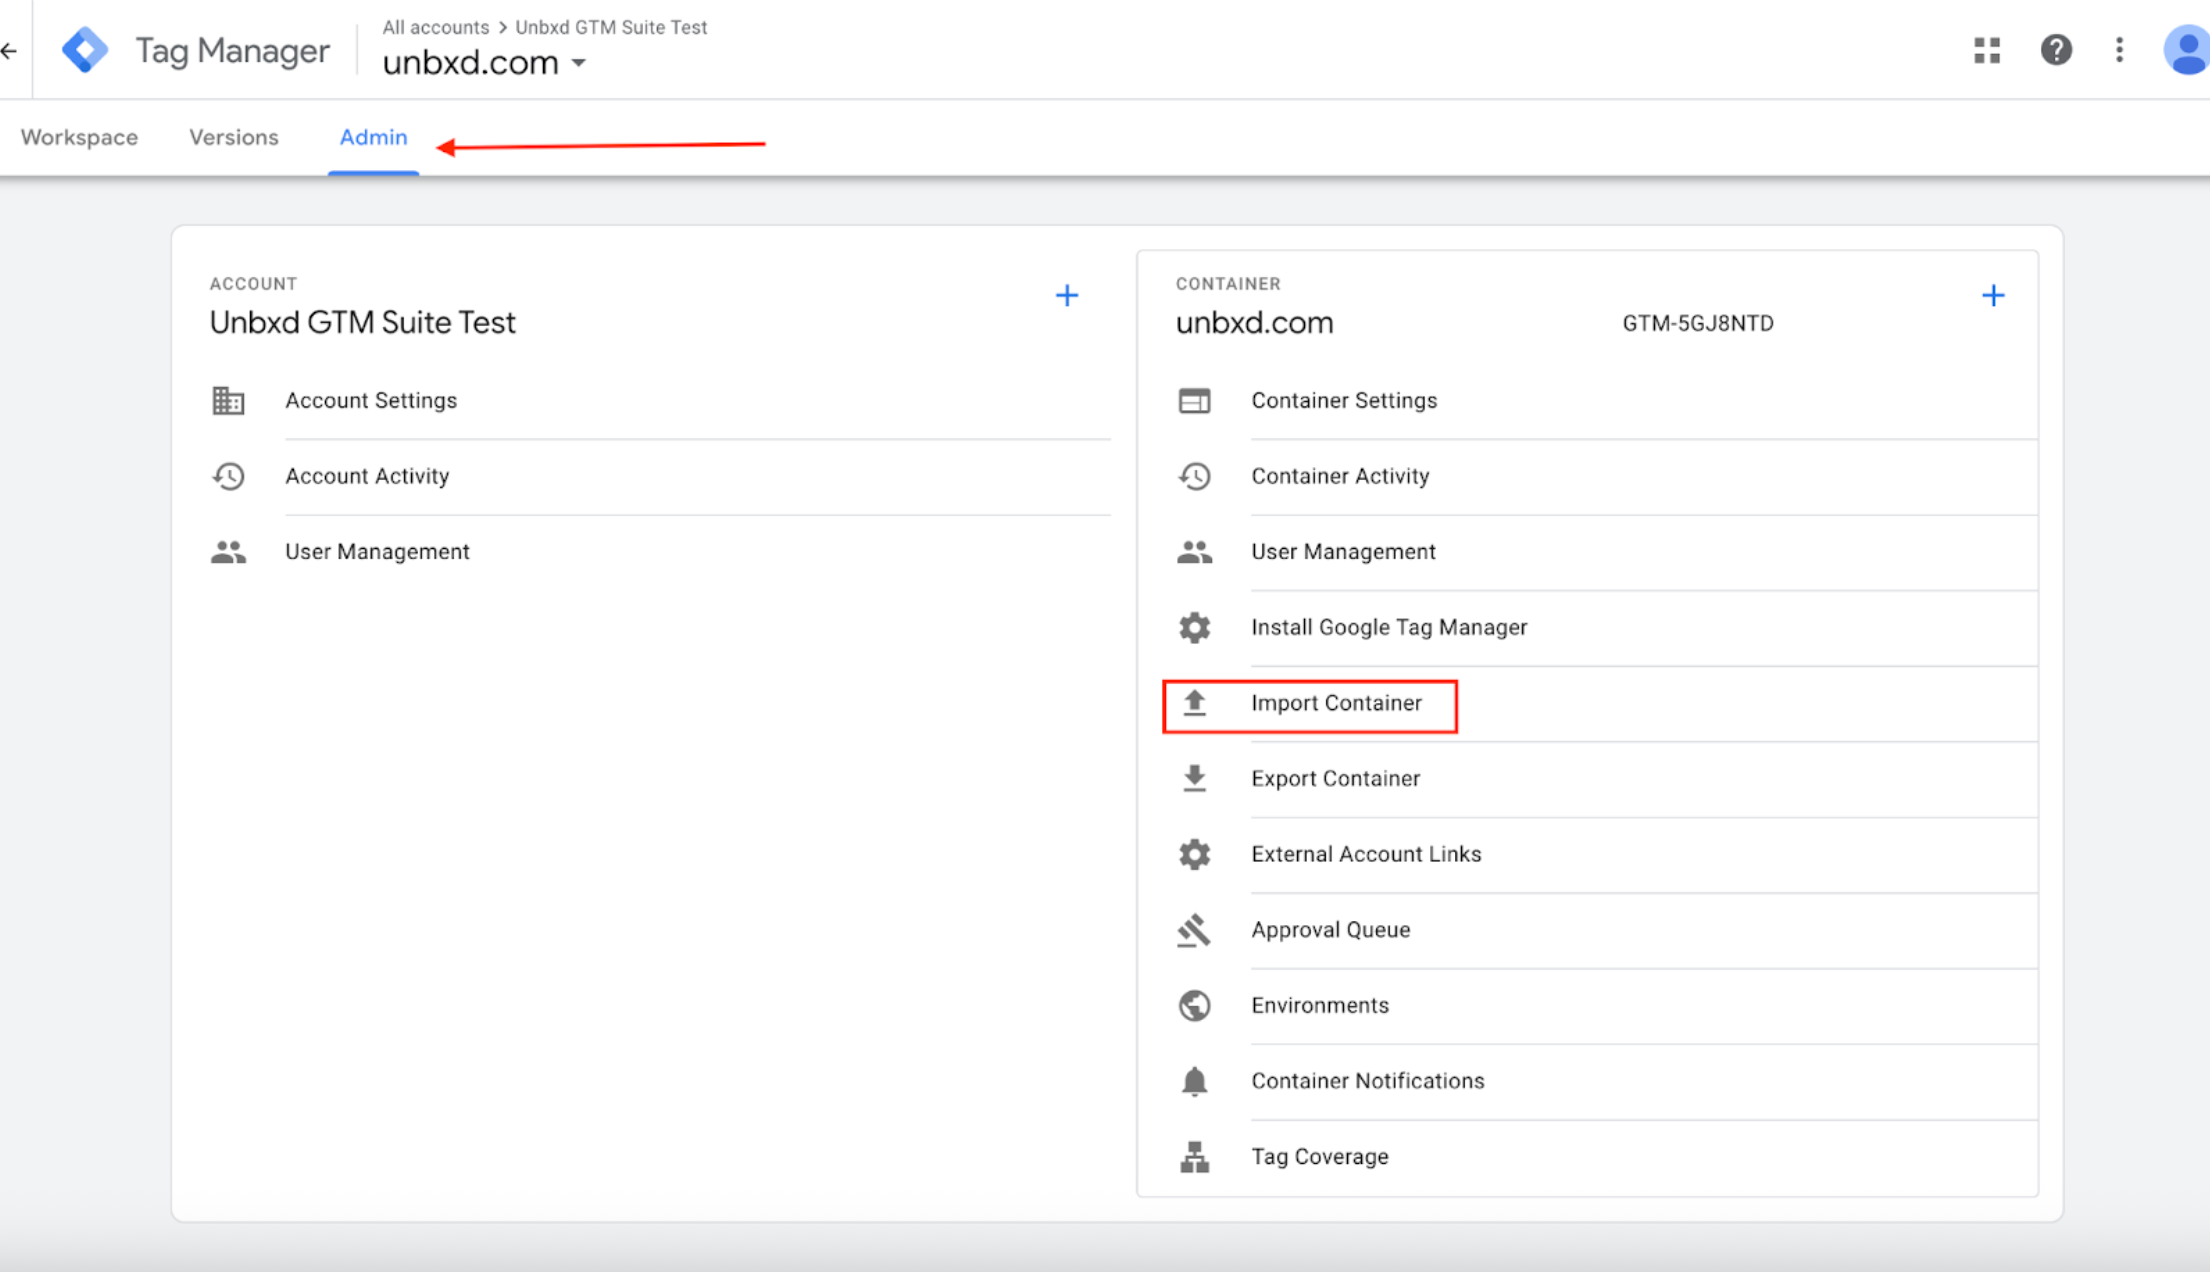
- From this Admin section, select the option for import container as highlighted in the screenshot above, which should open a pop-up section for choosing files and settings for import:
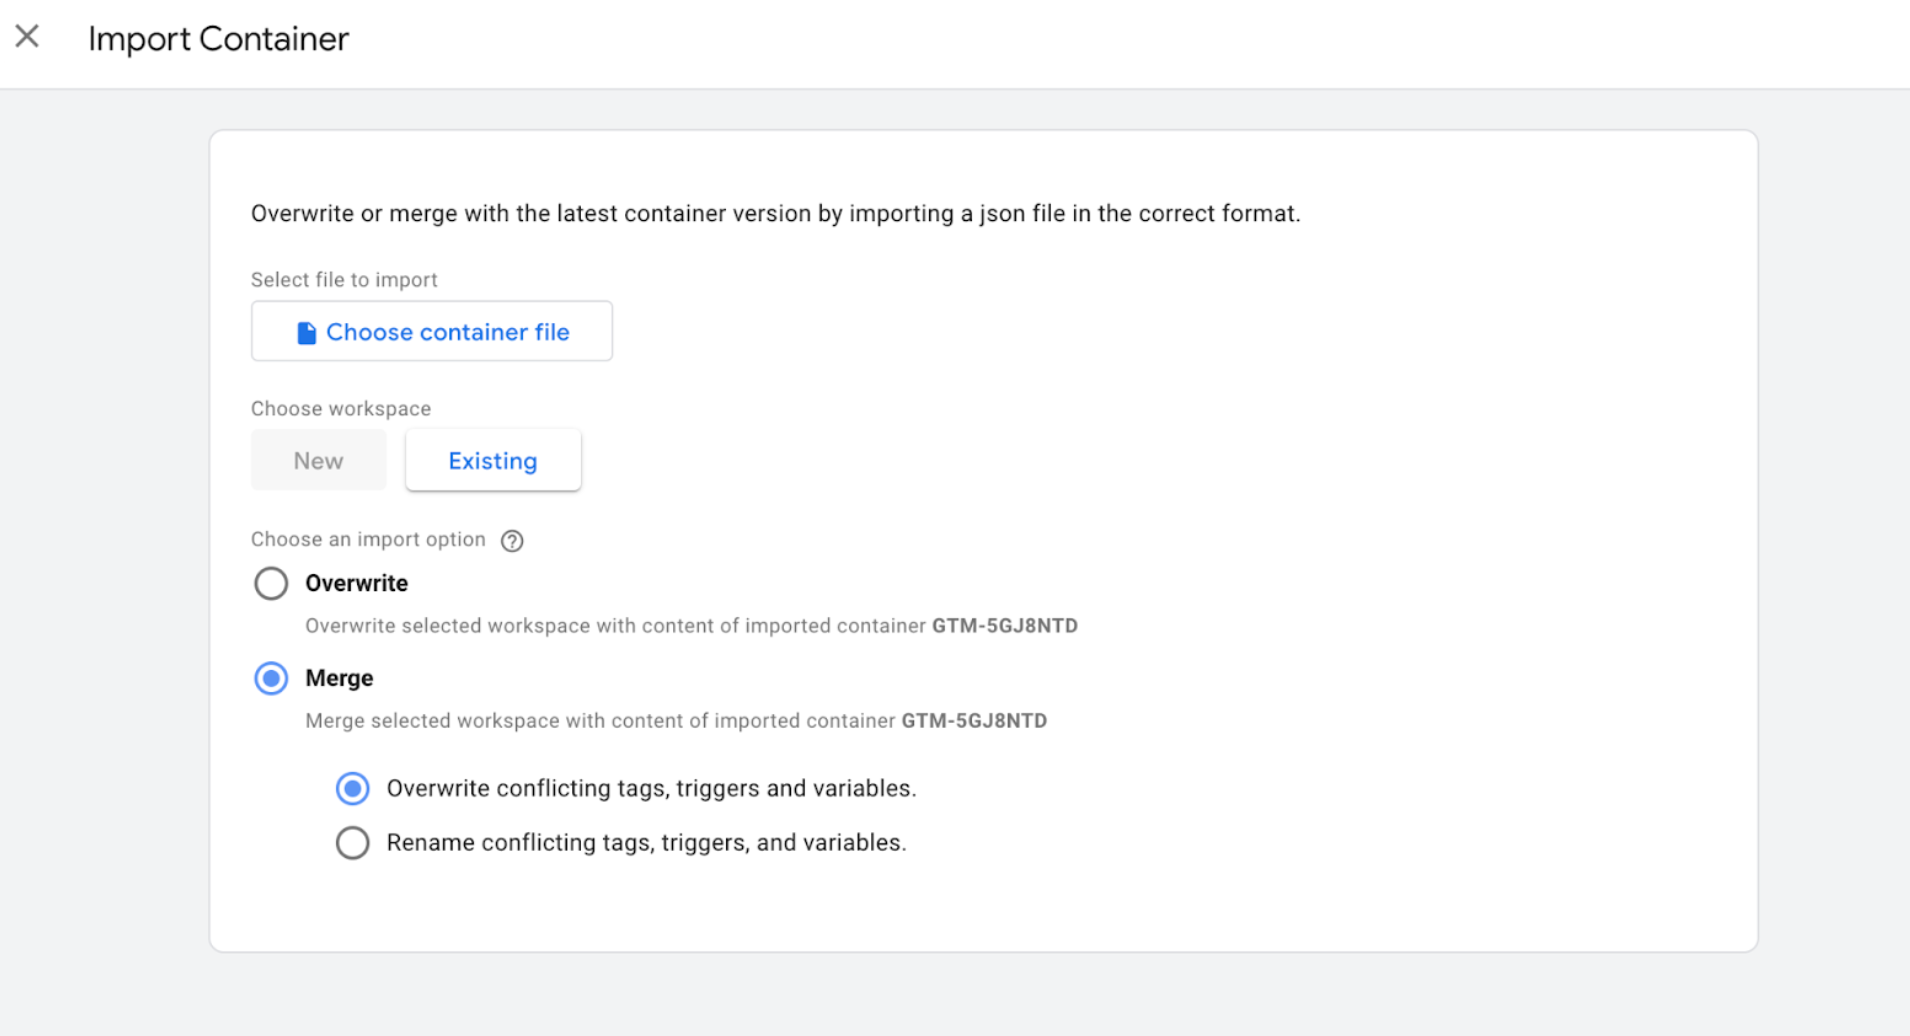
- In the above screenshot, select options as per guidelines mentioned below:
- In the option “Choose container file” select the downloaded file (in prerequisites), from your local which you have downloaded from prerequisites.
- Choose the workspace where you are uploading. Select the current (default workspace) if that is the one where you want to add these configs.
- In “Choose an import option” > select option to “Merge” > “Overwrite conflicting tags, triggers and variables”.
NoteOur tags, triggers and variables have Unbxd specific names and we should ideally overwrite. Please select this under merge option and not the complete overwrite option as that will delete the existing setups from client's dashboard.
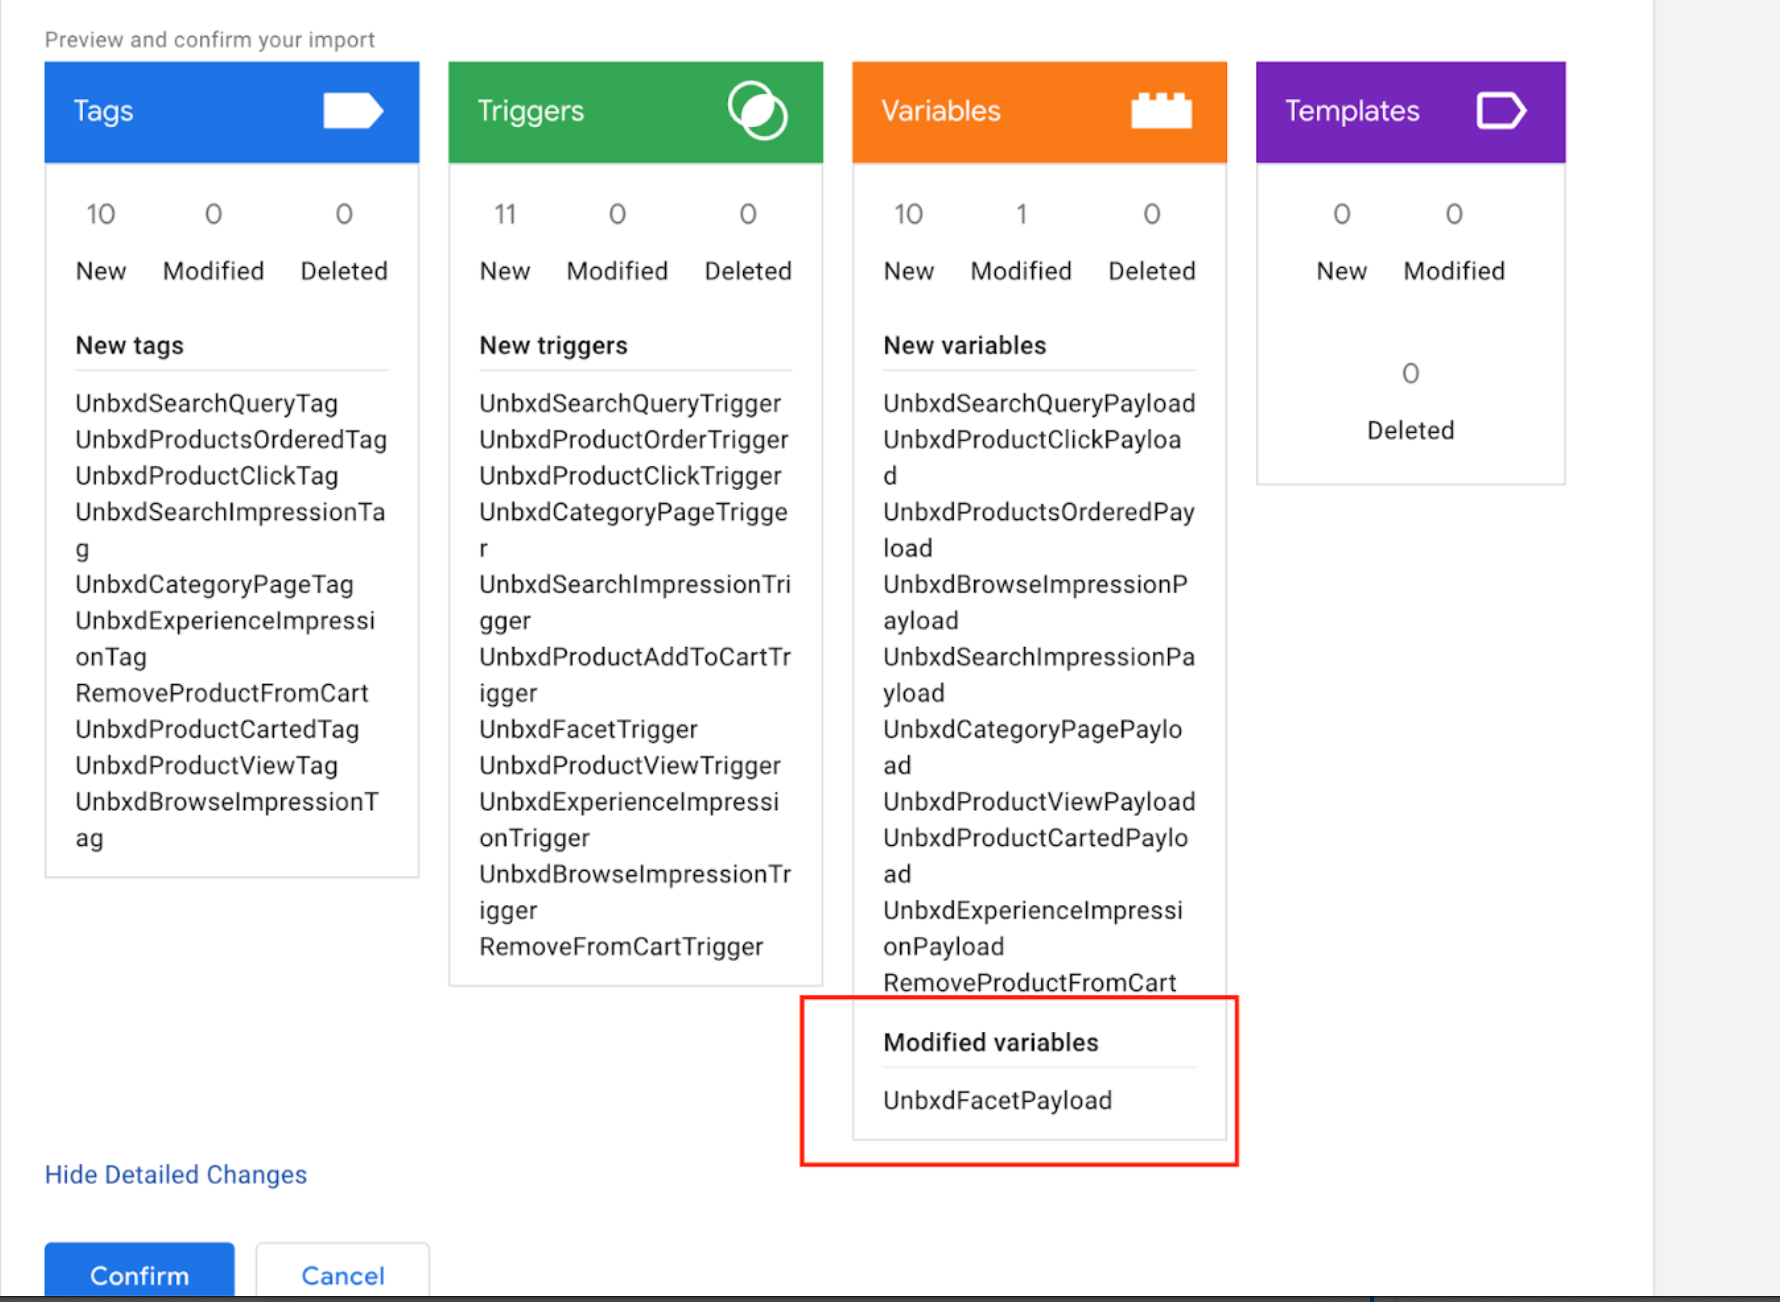
- After you select the options as per the above step, you will see a preview of changes that will be added or modified with this import. If nothing conflicts with the existing setup, you will see only additions; otherwise, you will see modified values as well.
For example, In this I have selected option to merge configs from gtmtrigger.json file to workspace “stage-unbxd-2”.It will highlight the changes that are getting added as in the screenshot below.

- If you select the option to view Detailed changes as marked in the above screenshot, you can see the details of the changes that are getting added.
If it has any existing config conflicts with the new config being added, it will come under modified values instead of new values, as in the screenshot below. Click on confirm after validation, and it will get updated:
- Finally, after previewing the details click on confirm. That will bring in all these tags into the selected workspace for the container. You can validate by checking the tags, triggers and variables.